

How to Use Hairspray for 3D Printing to Improve Bed Adhesion
Discover how using hairspray for 3D printing boosts bed adhesion. Easy tips for better prints every time!
Understanding Hair Spray for 3D Printing
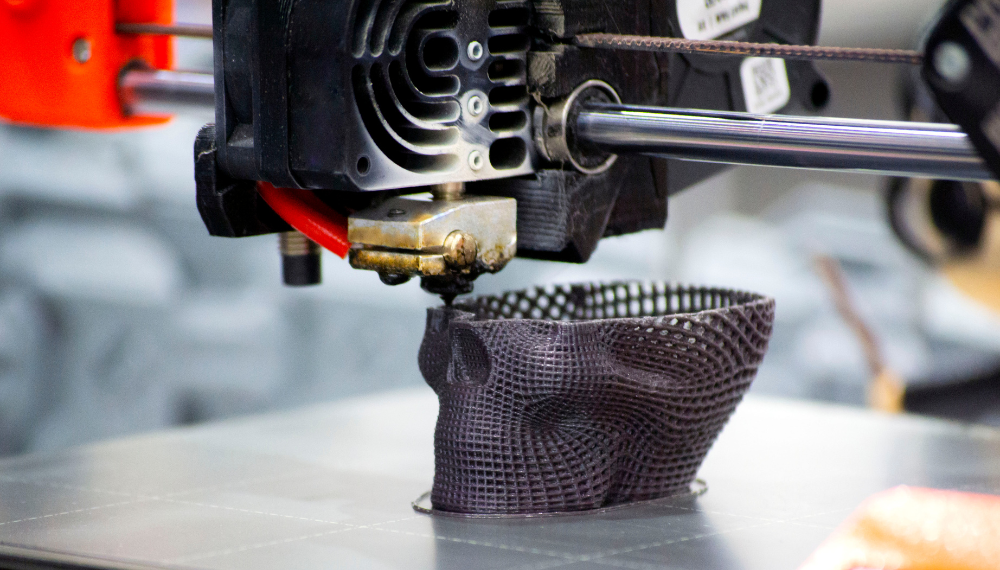
Okay, so hairspray for 3D printing might seem a little odd at first, but trust me, it’s pretty nifty! It can really help your prints stick to the bed better. Let’s break this down and see what’s going on.
The Science Behind Hair Spray Adhesion
When I stumbled upon the idea of using hairspray as a 3D printing helper, I couldn’t help but dig into the ‘why’ behind it. Turns out, the magic beans in this hairspray trick are these things called “VA/Crotonates Copolymer,” which goes by the longer name “vinyl acetate/crotonic acid copolymer.”
Here’s how it helps your prints:
-
Chemical Wizardry: The copolymer is a smart synthetic polymer. It turns sticky when it heats up, which is super helpful for keeping your filament glued down to the print bed. The double-bonded Oxygen in this stuff really helps stickiness stick.
-
Heat Equals Stickiness: The sticky magic depends on heat. As the bed warms up, the copolymer gets all tacky, helping keep your print from roaming around or curling as you print.
-
Works with Your Filaments: Hairspray doesn’t play favorites; it’s good with different filament types like PETG and PLA. This means it’s a solid option to try if you’re working with various materials.
| Ingredient | How It Helps |
|---|---|
| VA/Crotonates Copolymer | Gets sticky with heat |
| Isopropyl Alcohol (IPA) | Helps remove prints easily |
- IPA for Easy Removal: Once you’re done printing, getting your stuff off the bed can be a hassle. Enter isopropyl alcohol (IPA)—your standard household solvent sidekick. A dab of this or a bit of spray can loosen things up nicely.
Knowing these bits makes it easy to understand why hairspray can be a cool trick up your 3D printing sleeve. Messing around with different brands like AquaNet or Got2b can show how each one plays the adhesion game. For instance, AquaNet sticks really well but might leave some gunk behind.
Armed with this knowledge, anybody new to 3D printing, like young entrepreneurs and small biz peeps, can decide if hairspray is the right call to boost their print adhesion game.
Selecting the Best Hair Spray for 3D Printing
Been playing around with 3D printing and realizing that keeping the first layer stuck to the bed is a real game-changer. So I dug into the world of hairsprays, yes you read that right! They can be a cheap and sneaky trick to boost adhesion. But before you start raiding the beauty aisle, let’s chat about what really matters and which ones are worth trying out.
Factors to Consider
1. Stickiness That Matters:
You want a hairspray that brings the grip. Honestly, it’s like glue for your prints. Get that right and you’re less likely to end up with those wonky or runaway prints.
2. Playing Nice with Filaments:
Different strokes for different folks, right? Filaments like PLA or PETG might not play nice with just any hairspray. Be smart about finding one that gels well with your specific filament buddy (3D Printing Spot).
3. Mess or No Mess:
Now, some sprays can leave your bed feeling sticky, like it just got out of a nacho party. It’s worth thinking about cleanup when picking your spray, unless you’re into that sticky vibe.
4. What’s In Your Pocket:
This hobby can gobble hairspray like nobody’s business, so think about cost. Plus, make sure it’s something you can easily grab off the shelf when you run out.
Recommended Hair Sprays
I’ve got a little cheat sheet here for ya. Here are some hairsprays I’ve tried and loved, plus a heads-up from the pros.
| Hair Spray | Stickiness | Mess Level | Cost ($) |
|---|---|---|---|
| Paul Mitchell Finishing Spray | High | Low | 18 |
| L’Oreal Paris Advanced Hairstyle | Medium | Medium | 6 |
| Suave Aqua Net Extra Super Hold | High | Medium | 3 |
| Garnier Fructis Style Control Anti-Humidity | Medium | Low | 4 |
| Suave Unscented Hairspray Extreme Hold | Medium | Low | 3 |
Sources: 3D Printing Spot and 3D Printer Review Blog
1. Suave Aqua Net Extra Super Hold:
Aqua Net’s like the trusty old family sedan of hairsprays. It’s known for getting stuff to stick hard without breaking the bank. Residue is a thing, but man, it seriously grabs onto the bed (3D Printer Review Blog).
2. L’Oreal Paris Advanced Hairstyle:
This one’s like a balanced meal: good adhesion without the drama when cleaning up. Plus, you’ll find it pretty much everywhere, even in small stores.
3. Paul Mitchell Finishing Spray:
This is the fancier option. It nails strong adhesion and doesn’t leave a sticky afterparty on your bed. It’s perfect if you’re a neat freak and don’t mind spending.
4. Garnier Fructis Style Control Anti-Humidity Hairspray:
Sticky and smart! This one’s made for those places where humidity’s high and you curse your frizzy hair and warped prints. Keeps things in line when the weather’s not cooperating.
5. Suave Unscented Hairspray Extreme Hold:
Cheap and cheerful, it’s great for old-school uses. It grips without leaving a mess. Your bank balance will thank you.
So there you have it! The right hairspray can be your secret weapon in the 3D printing arena. Give these a try, fiddle around a bit, and figure out what works for your setup. Happy printing!
Application Techniques for Hair Spray
Utilizing hairspray when working with 3D printing is like discovering a hidden cheat code. Trust me, I’ve picked up a few tricks and tips from my own mess-ups and wins, so let me walk you through making the most of this handy tool. For more insights and resources, check out this 3D printing website to take your projects to the next level.
Preparation and Application
Here’s how to kick things off, without the drama or dust bunnies:
-
Clean the Build Plate: Start by getting rid of any gunk or crumbs. Grab some isopropyl alcohol and a lint-free rag to give the plate a good wipe down. Clean slate, happy plate.
-
Select the Right Hairspray: You’re not just looking to style your do here; make sure the hairspray has “VA/Crotonates Copolymer,” which is apparently the secret sauce for ABS (Stack Exchange).
-
Protect Surrounding Areas: Nobody likes sticky surprises! Cover the other parts of your 3D gizmo to dodge the rogue specks of spray.
-
Spray Evenly: Stand about 10-12 inches away—don’t get shy now—and give it a quick, light spritz. Channel your inner Goldilocks here: aim for “just right”, not too heavy.
-
Heat the Build Plate: Get that plate cooking. A warm plate loves hairspray and it’s science or something. Let the stickiness do its thing.
-
Drying Time: Patience, young grasshopper. Let it dry for a spell as the plate finishes its warm-up dance.
Dos and Don’ts
Let’s keep it real simple. Stick to these dos and don’ts for the best results:
Dos:
- Test it out on a random spot first before going all-in on the whole deck.
- Reapply when the stick gets weak after some prints.
- Ventilate, don’t suffocate! Keep air flowing so you’re not gulping down fumes.
- Clean up after each run to keep things fresh and non-sticky.
Don’ts:
- Avoid getting too chummy with the nozzle; hold back, save the wet look for hair.
- Don’t spray on a cold plate—what’s it gonna stick to, thin air?
- Don’t drown it; excessive goo can ruin your masterpiece.
Here’s your cheat sheet:
| Task | Instructions |
|---|---|
| Cleaning | Isopropyl alcohol wipe-down |
| Spraying | Quick, light coat from 10-12 inches |
| Heating | Fire up the plate, evenly warm |
| Ventilation | Open-air atmosphere, folks |
| Post-finishing | Clean plate after each go |
Stick to this guide, and you’ll be slicking down hairspray like a 3D printing pro. It’s like having that magic touch; now go own your print game!
Troubleshooting Bed Adhesion Issues

Let’s chat about something very near and dear to me: bed adhesion in 3D printing. Getting this right makes all the difference between a masterpiece and a mess. So, let’s dig into some handy tips and tricks for getting those prints to stick just right.
Effective Solutions
Getting good bed adhesion is like laying down a rock-solid foundation for a skyscraper. We want to avoid any print drama, like warping or parts flying off. Here’s how:
-
Adjusting Z-Offset: A lil’ twist here and there can work wonders. The nozzle’s height over the print bed can be your worst enemy or your new best bud. Fiddle with the slicer settings to get that sweet spot.
- Test Print Tip: Do a few practice runs. Watch and learn where the nozzle likes to hang out.
-
Using Adhesives: Good ol’ hairspray isn’t just for sprucing up your ‘do. It’s a trusty friend for improving grip on your print bed. Give it a good mist before hitting ‘print.’ Or go for glue sticks, painter’s tape (perfect for PLA), or Kapton tape (great for ABS).
-
Bed Surface Maintenance: Keep it tidy. A clean bed is a happy bed. Say goodbye to gunk and be light-handed with adhesives.
-
Initial Layer Temperature: Start hot; it helps the first layers bond like besties. Once you’ve got them snuggled up, dial back to a sensible temperature for the filament type.
Experimenting with Bed Temperatures
The heat on your print bed is pretty crucial, kinda like picking the right sweater for a chilly day. It’s especially key when you’re working with spools of ABS or PLA. Tinkering to find the right temp is a must.
| Filament Type | Sweet Spot for Bed Temperature (°C) |
|---|---|
| PLA | 60 – 70 |
| ABS | 90 – 110 |
-
Testing Temperature: Begin with what’s recommended and see how the first layers behave. Got 70°C for PLA? Play around, bumping it 5°C up or down ‘til it’s happy.
-
Adjusting for Environment: Room temps can be fickle, and different filament brands have their quirks. Mess around until you hit the jackpot.
-
Cooling Methods: If your print is playing too hard to get and won’t come off the bed, chill it out. Stick it in the freezer or blast it with canned air. It might just decide to let go (Wevolver).
By putting these tips to the test and playing with temps, bed adhesion issues will be yesterday’s news, and you’ll be cranking out more successful prints in no time!